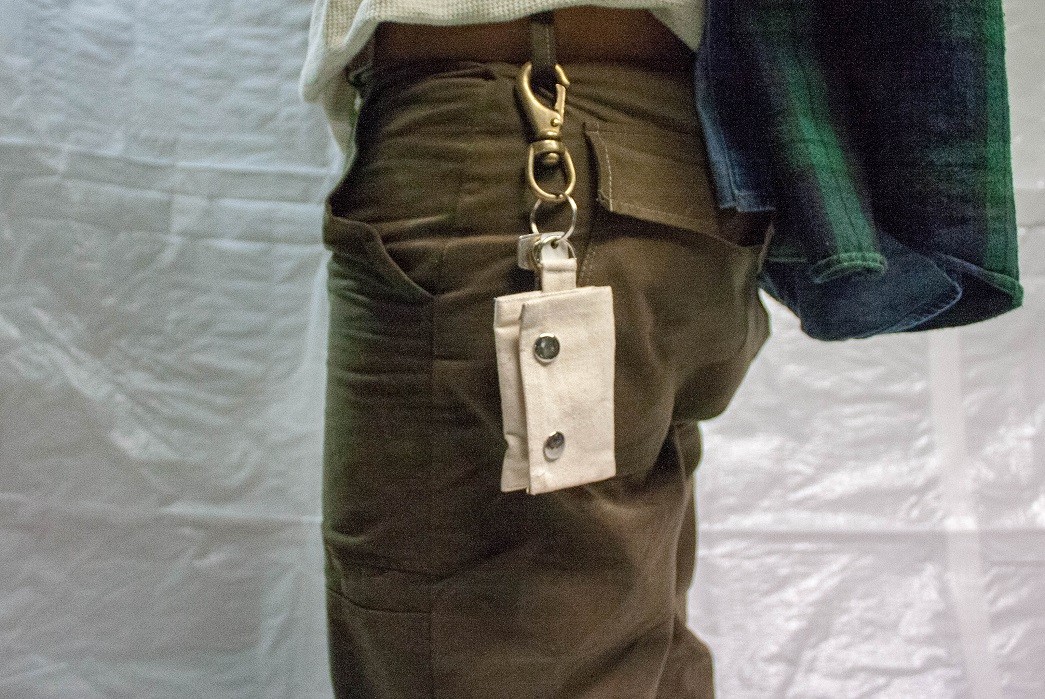
Now that we’ve covered the basics of buying your first sewing machine and how to set it up, it’s about time we started a small project. A small coin wallet is a really quick, easy, inexpensive starting point.
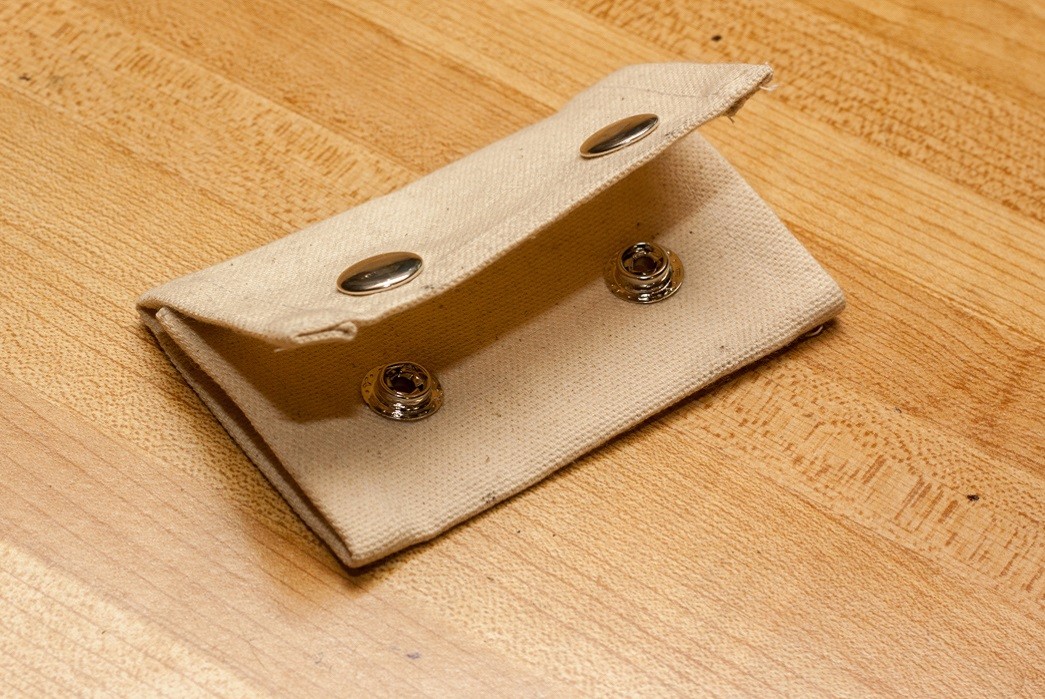
The one I am going to show you how to make will have one compartment, snap closure, and a ring to attach it to your choice of carabiner, key hook, belt loop buddy, etc. The size is nice to hold cash, change, or credit cards. However, since the pattern is so simple, you can easily modify it to something that better suits you. Let’s begin!
What You’ll Need

- About 1 square foot of heavy, preferably cotton material
- 1 3/4″ D ring
- 1 Set of snaps (I used line 24 snaps)
- Ruler
- Chalk
- Thread
Sourcing Materials
One of the best parts about small projects like this one is how little you need to buy. Since you will not need much material, you can get away with making this out of small scraps from other projects. Alternatively, you can re-purpose unused clothing or other items.
Snaps cannot really be re-used, but they are easy to find at craft stores, leather working stores, and art supply stores.
How To
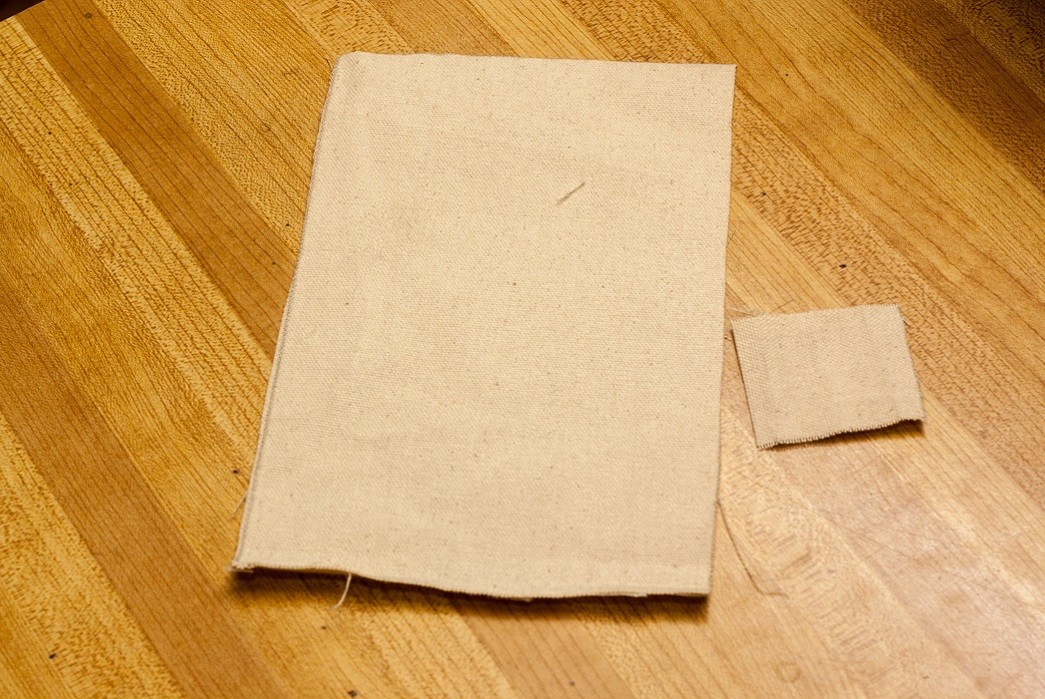
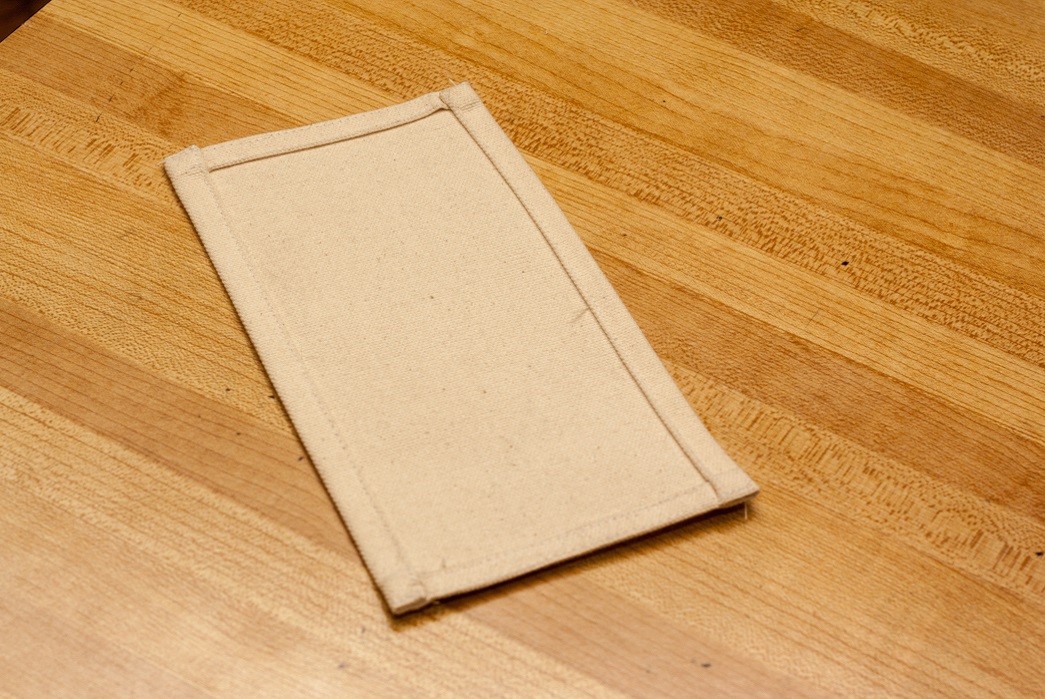
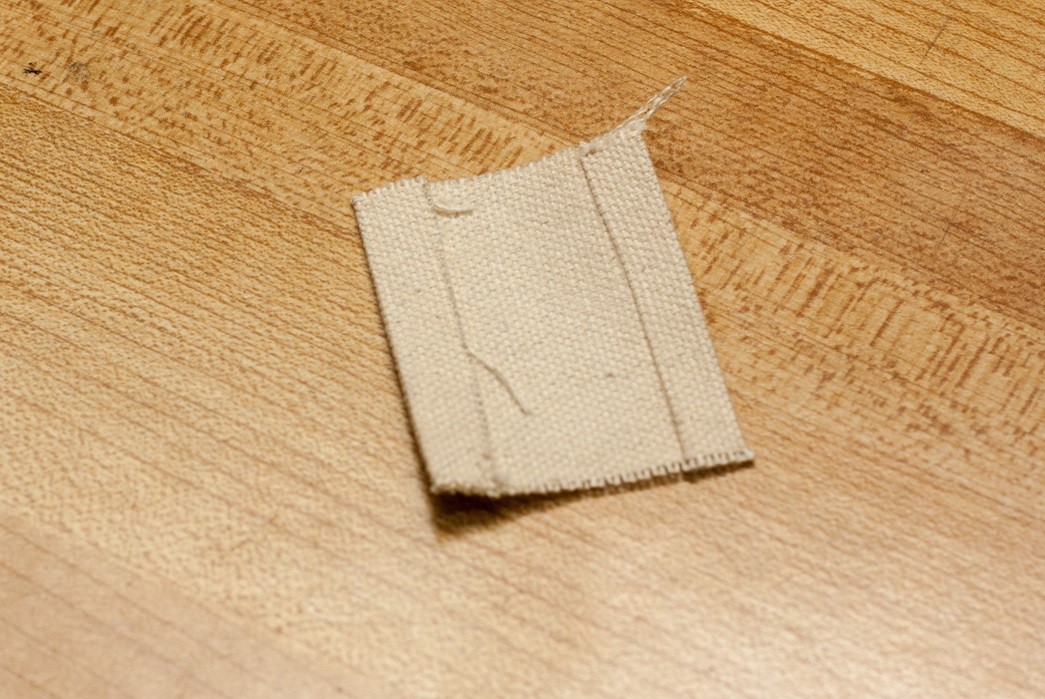
- To start, cut one strip 9″ by 5.5″, and one 2″ by 2″ square.
- Press the edges of the fabric on the larger piece over 1/4″ twice to form the finished edge. Clip the corners so nothing is protruding once finished.
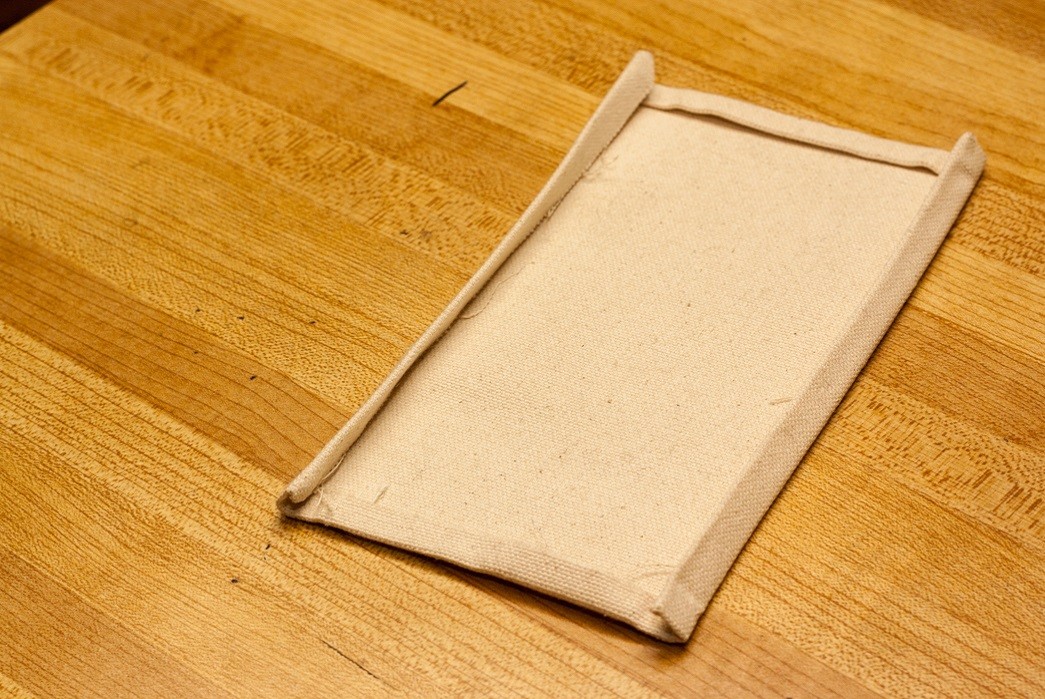
- Sew one continuous line around the hem, and one line at the top of both the narrower ends to close up any gaps.
- With the smaller square piece, press two edges inwards 1/4″, then fold them together and sew along the edge.

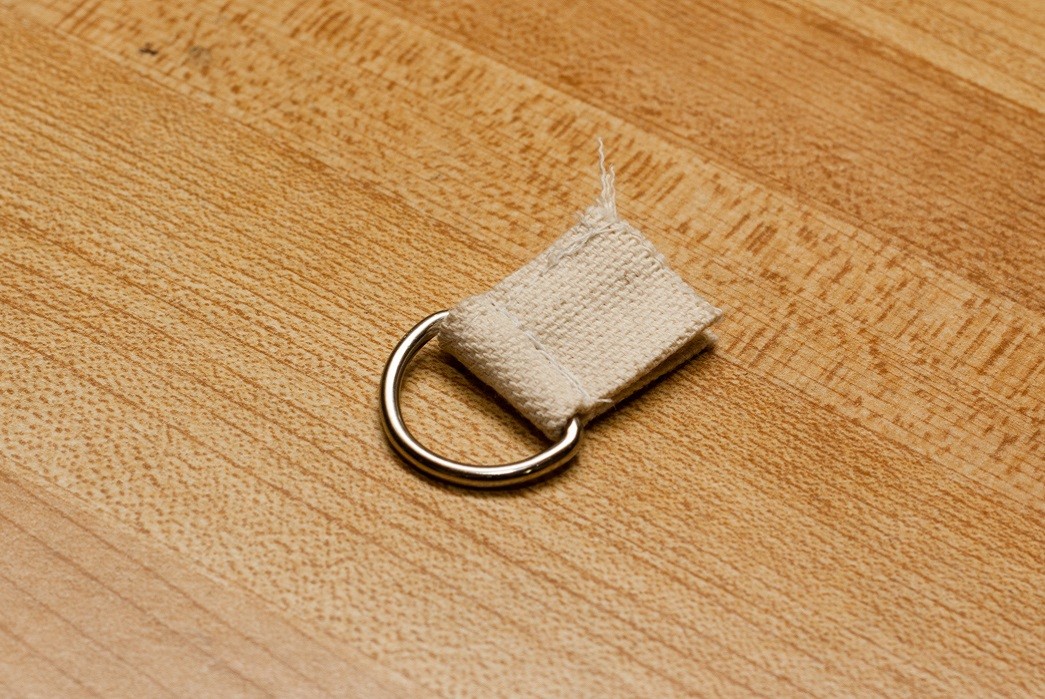
- Fold that piece in half, set the d-ring in the middle, and sew back and forth a couple of times as close to the d-ring as you can get.
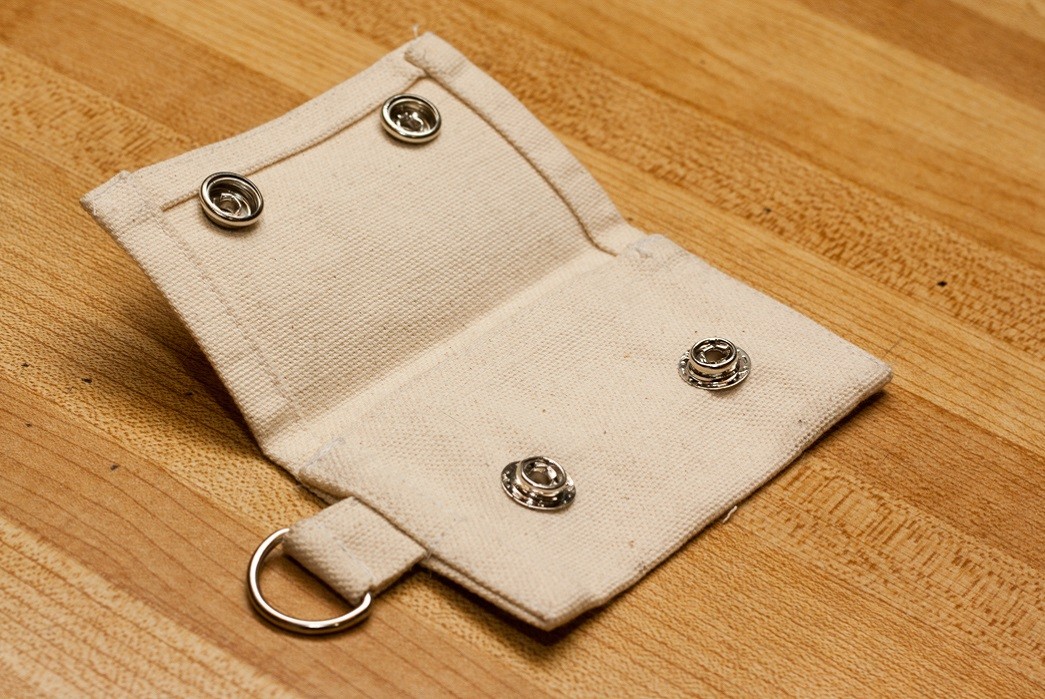
- Now with the body, press the flaps into the final position. The pouch should be about 2.5″, and the flap should go almost to the bottom of the pouch.
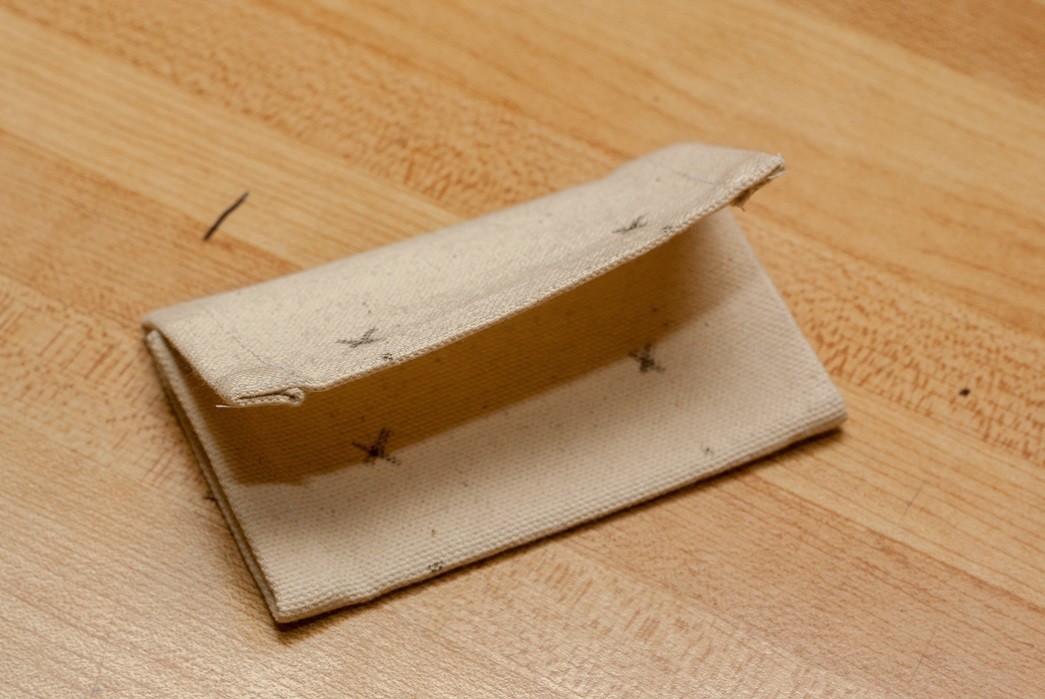
- This is a good time to put the snaps on. Mark a 1″x 1″ square on the pouch, and put the snap on where the lines intersect. Trace the same lines onto the flap, and put the top of the snaps at the intersection.
- At this point, tack the loop with the d-ring on inside. Its nice to follow the stitching you have already done for the hem to keep things looking clean.
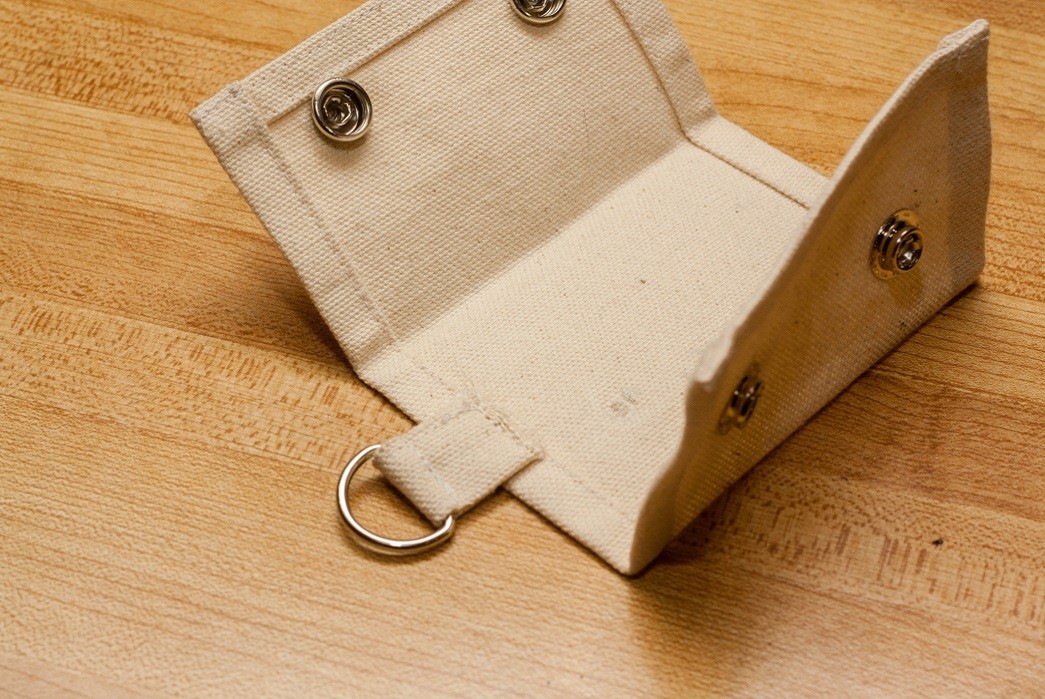
- Close the pouch up on both ends. Sew along the very edge, taking care to back stitch at the beginning and end of the seam. I like to go over the corners a couple of times, just to make sure nothing comes undone. Be careful when going over the d-ring loop, as the material is quite thick at that point.
- Finally, trim any loose thread, and press all the seams one more time.
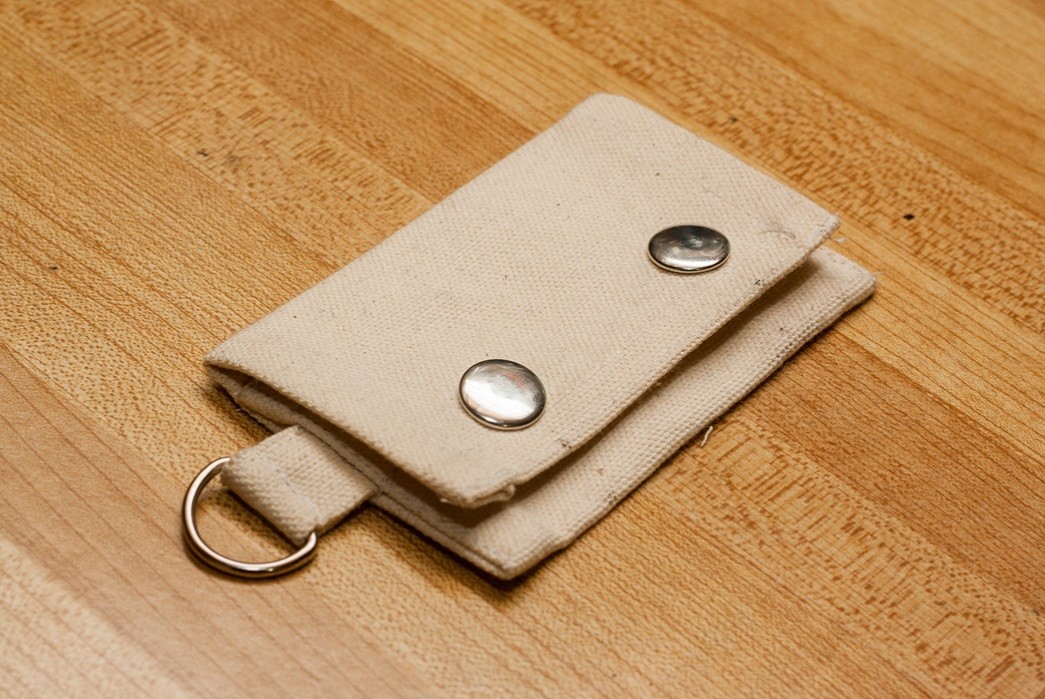


There you go, it’s that simple! a couple of cuts, a couple of seams, hammer on some snaps, and in about 40 minutes you’ll have your very own coin wallet.