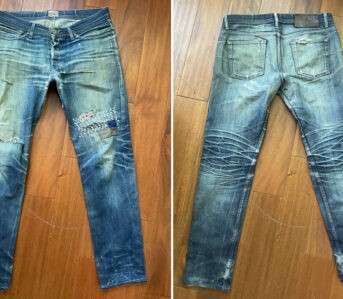
Similar to our hand patching and hand darning articles that focused on repairing denim, most any hole can be patched in similar ways on a tee. If you’ve beaten one of your favorites a bit too far, give it some more life. Got an old tee you want to resurrect? Dig it out and see if these techniques can help you.
We’ll be covering the common armpit hole repair and a huge split on the back of another tee. Both are fairly sizable but the owner adores these tees so I was happy to put them back together as best I could. Don’t be afraid to do the same with yours.
This guide is written by our very own Jack Van Leeuwen, who is a maestro when it comes to garment repair. He actually has his own business that specializes in the mending of vintage garments, which can be found on Instagram @luckylostrepairs.
What You Need
Here’s what you’ll need:
- Thread
- Needles
- Scrap fabric
- Pins
- Shears/Scissors
- Thread snips
- Iron
- Optional: embroidery hoop
Thread

Olympus sashiko thread in black. $2.75 from Fancy Tiger Crafts
For the back split example, I opted for a black sashiko thread. Here is a local craft shop in Denver that carries fine sashiko, they also ship!

Connecting Threads all cotton thread spool in black. $7.99 from Amazon
Additionally, I used all cotton black thread for the armpit patch example and to stitch the backing on the large tear example. I’ve been using more hand embroidery weight thread for these projects so here’s a link above to some.
Needles

Singer Assorted Hand Needles. $2.37 from Amazon.
Recently I’ve been using this amazing Singer needle set from Amazon. I enjoy the shorter needles and the larger eyes work for sashiko and the smaller are perfect for the embroidery thread.
Scrap Fabric

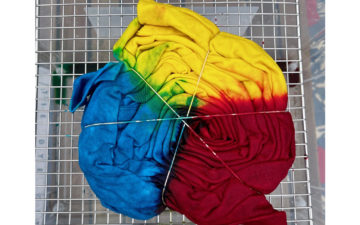
Scrap fabric from 90’s tee.
For this project, the client provided me with a 90s single-stitch black tee to cut up and patch with. Both repair tees are 80’s-90’s era so it worked perfectly. For your projects, I recommend sourcing scrap as similar in colorway and composite as you can, i.e. all cotton scrap for an all-cotton tee, 50/50 scrap for a poly/cotton tee, etc. Thrift shops and old tees you no longer wear are my recommendations for sourcing. Ask around, someone has scrap they can impart to you and something used will likely blend in better than a brand-new fabric.
You’ll want to back a good deal larger than the hole itself, so keep that in mind when sourcing scrap. More is better than a tiny strip.
Like this? Read these:

Pins

Grabbit Steel Pins, 1 1/2″, 80 count. $1.98 from Wawak.
A set of fabric pins or safety pins will prove useful, as well, for holding your repair in place while you stitch it. I enjoy the ball pins with bright colors but as always, do you!
Scissors

Gingher Knife Edge Serrated Bent Trimmers – 8″. $29.95 from Wawak..
Investing in a decent pair of scissors or shears will come in handy to cut your fabric cleanly. Again, Wawak has a nice selection of shears.
Thread Snips

Thrifty Thread Snips. Available for $2.98 from Wawak.
Thread snips are useful for cutting your thread at the start and end when you go to tie off knots.
Iron

Not required but helpful — an iron. Wawak has a slew of industrial-grade irons if you feel like sewing is your next big thing, but I use a simple home iron for all my repairs, which you can find at any craft or department store.
Embroidery Hoop

Darice Wooden Embroidery Hoop. From $4.00-$7.00 at Fancy Tiger Crafts.
Lastly, I tried using an embroidery hoop for the first time on the armpit hole. Since tee fabric is light relative to denim and canvas, it can be cumbersome to work with. I found the hoop very useful for keeping everything taut. I used an 8″ one for this project.
Steps
Now for the fun part.
Step 1:

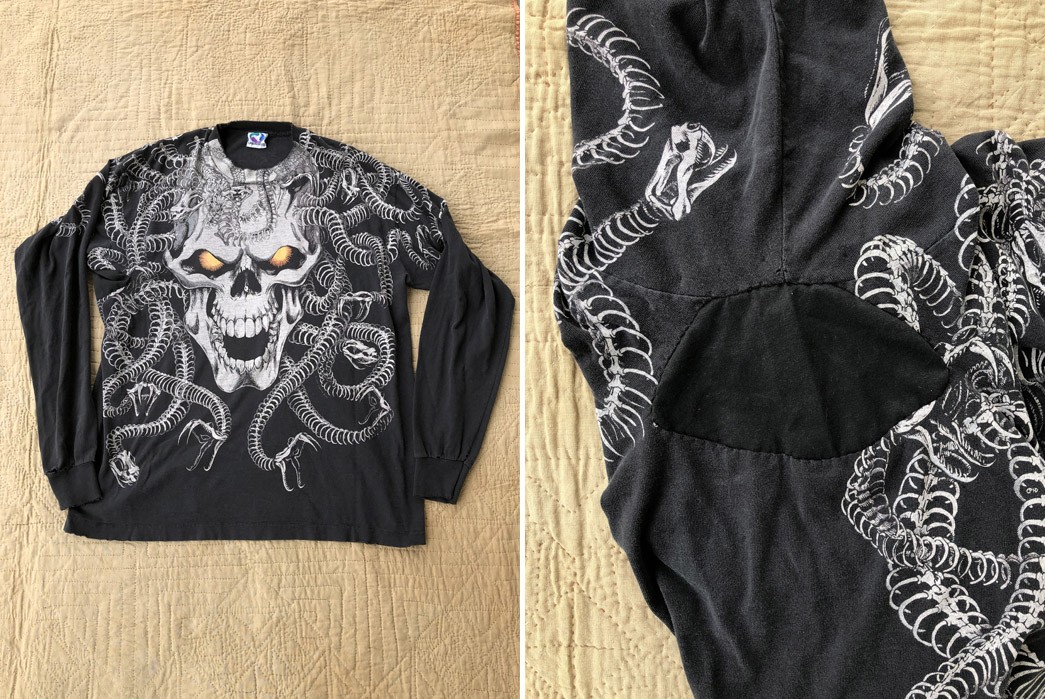
To start, identify the hole you want to patch. For this example, the client brought me a 90’s Liquid Blue all-over print long sleeve and an 80s Metallica tee. The Liquid Blue needed the pit patched and the Metallica tee needed a large ‘L’ shaped tear on the back repaired—apparently, this happened while climbing a tree!
Step 2:

Now to prep the holes. First, I turned the Liquid Blue tee inside out and pinned the scrap as centered as I could. Then I turned it back right side out and pinned it around the edge of the hole, hand folding the raw edge under as I went. You can iron this fold down to keep it in place (before placing the pins) if it keeps coming unfolded. I also placed some pins around the outside to keep the edges of the scrap out of the way.

Step 3:

At this point, we’re ready to start whip-stitching the folded edge using the embroidery thread. I really fleshed out how to whip stitch in the hand-patching denim article, so please reference that to pick up the technique! Steps 5 to 9 are the most relevant.
As I started to whip stitch, I noticed how much trickier working with the tee fabric was, so I attached the embroidery hoop to the section I was working on and moved it as I made progress across the repair. The taut fabric was much easier to work with.
Step 4:

Lastly, for the Liquid Blue tee, I simply used a sort of pick stitch / running stitch hybrid to stitch around the hole. I tried to do so a few inches or so around the whip-stitched hole. You can be as methodical or not as you like here. Tighter stitches may reinforce better but on a stretchy tee like this, I often go a bit looser. I’ve also gone over this running stitch technique very thoroughly in the hand patching denim article, step 10.
And voila, an armpit patch you have.
Step 1:

Diving into the Metallica tee, I was struck by how large the tear was and how tricky it would be to line the graphic up, so it was all in the prep for this one. To start, I pieced the font and outline of the sun together. Next, I stitched the graphic section together.
For this tee, I opted to use a blanket stitch since it’s awesome at bringing two pieces of fabric together in a clean and finished way. I think it was traditionally used to finish edges on blankets and quilts, don’t quote me. I kept the edges raw instead of folding them over so I could get the graphic back together as much as I could without losing the image. And I went with the sashiko thread because it’s easier to blanket stitch with and is strong enough to hold the two edges together.
Here I’ve outlined the technique with black fabric and white thread for easier visibility. So, to blanket stitch, start by cutting a single strand of sashiko, tie off one end, and thread the needle with the other. Make sure to keep at least a few inches of thread pulled through the needle at all times otherwise, it likes to slip out while stitching.

Next, line up your two pieces of fabric. Put your needle through the further piece of fabric and pull through, this way you can hide your knot end.

Then put your needle through the nearer and further pieces of fabric in the same spot you placed the initial stitch. I typically shoot for around 1/4″ stitch width or 1/4″ down from the raw edge of the fabric pieces. Pull the thread almost all the way through but stop at the end and run your needle through the little loop. Run the thread all the way through the loop and pull it taut to complete your first blanket stitch. Now it’s a rinse and repeat.

I like to also use a 1/4″ stitch length or so. It may take a few tries to get the technique, so feel free to practice before diving into your project. You’ll notice the first 3-4 blanket stitches don’t quite have that clean finished top but once you go beyond the initial stitches everything starts to line up. At the end, simply run the thread through the fabrics to the inside, tie the end off, and snip. And there you have your blanket stitch!

Back to the Metallica tee, once I had the graphic blanket stitched, I completed the bottom of the ‘L’ tear with more blanket stitching.

Step 6:

From there, I backed the graphic section of the tee to better preserve it. I followed the same running stitch technique here as above. And there you have it, a repair on a large tear in a graphic tee!

Overall, patience seems to be the key to these tee repairs. Whether that’s carefully lining up a graphic or dealing with the lightweight fabric, taking your time and walking away for a second if you need will help you get these done nicely. As always, have fun and repair your favorite garments as long as you can. Cheers!
If you have any questions about this repair or any other repair guides on Heddels, ask @james or @daniel in the Heddels+ Discord, who will pass your questions on to the appropriate member of the Heddels team. Be sure to share whatever hand patch repairs you get up to using this guide in the H+ Discord as well!